Kitchen Remodel Reveal – A Beautiful Open Concept Update for the Empty Nest
Why Now?
Our nest has been empty for a few years. We took a look around and asked ourselves, cue the Clash, ‘Should we stay or should we go now?’ Our 3 bedroom, 2.5 bath home was built 30 years ago. We’ve been in it for over 20. During that time, we have made some good improvements and updates. The location central in town is terrific and the size is good. I still want to be able to accommodate our two kids and their families for visits. So, we’ve decided to stay and figured it was a good time for the big pain in the behind remodel. Because let’s be honest, the before and after home renovation shows don’t cover much about how an extensive makeover interrupts one’s life!
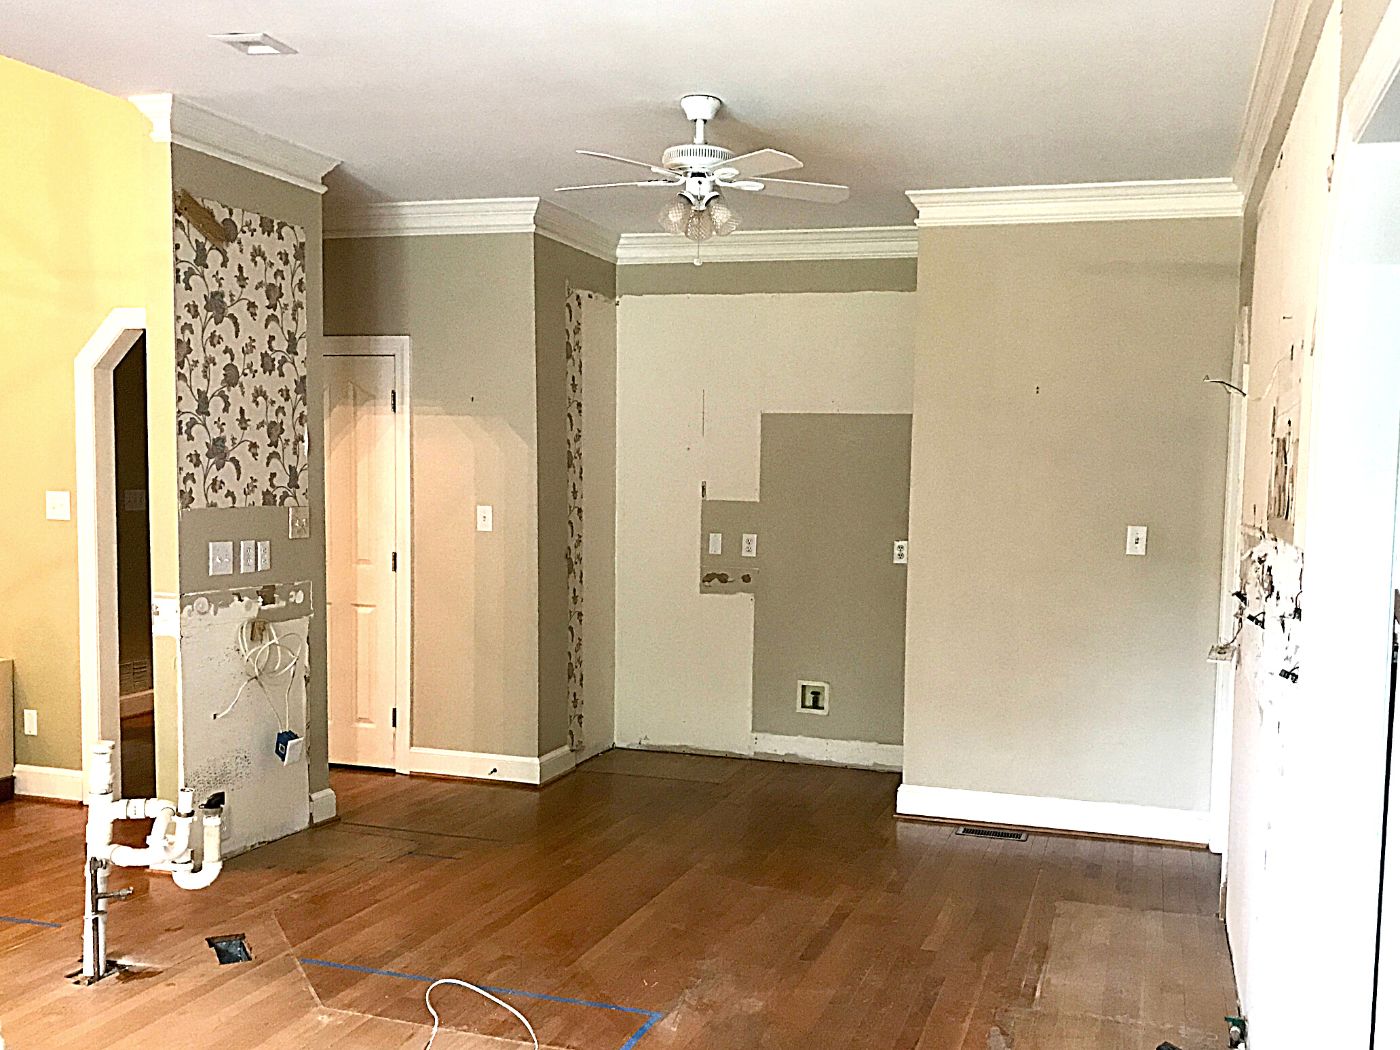
Before Remodel, Clunky Peninsula
Our kitchen wasn’t a horrible eyesore, but I had seen some friends move into new places and others do gut renos and had a bit of envy. We had a 1990s kitchen with a few design bandaids – we repainted the natural oak cabinets a creamy antique white and replaced the unattractive solid-surface countertops with granite. Both updates were on-point for 2006. But over the years, grays, whites, marble-looking countertops and open floor plans became the current style.
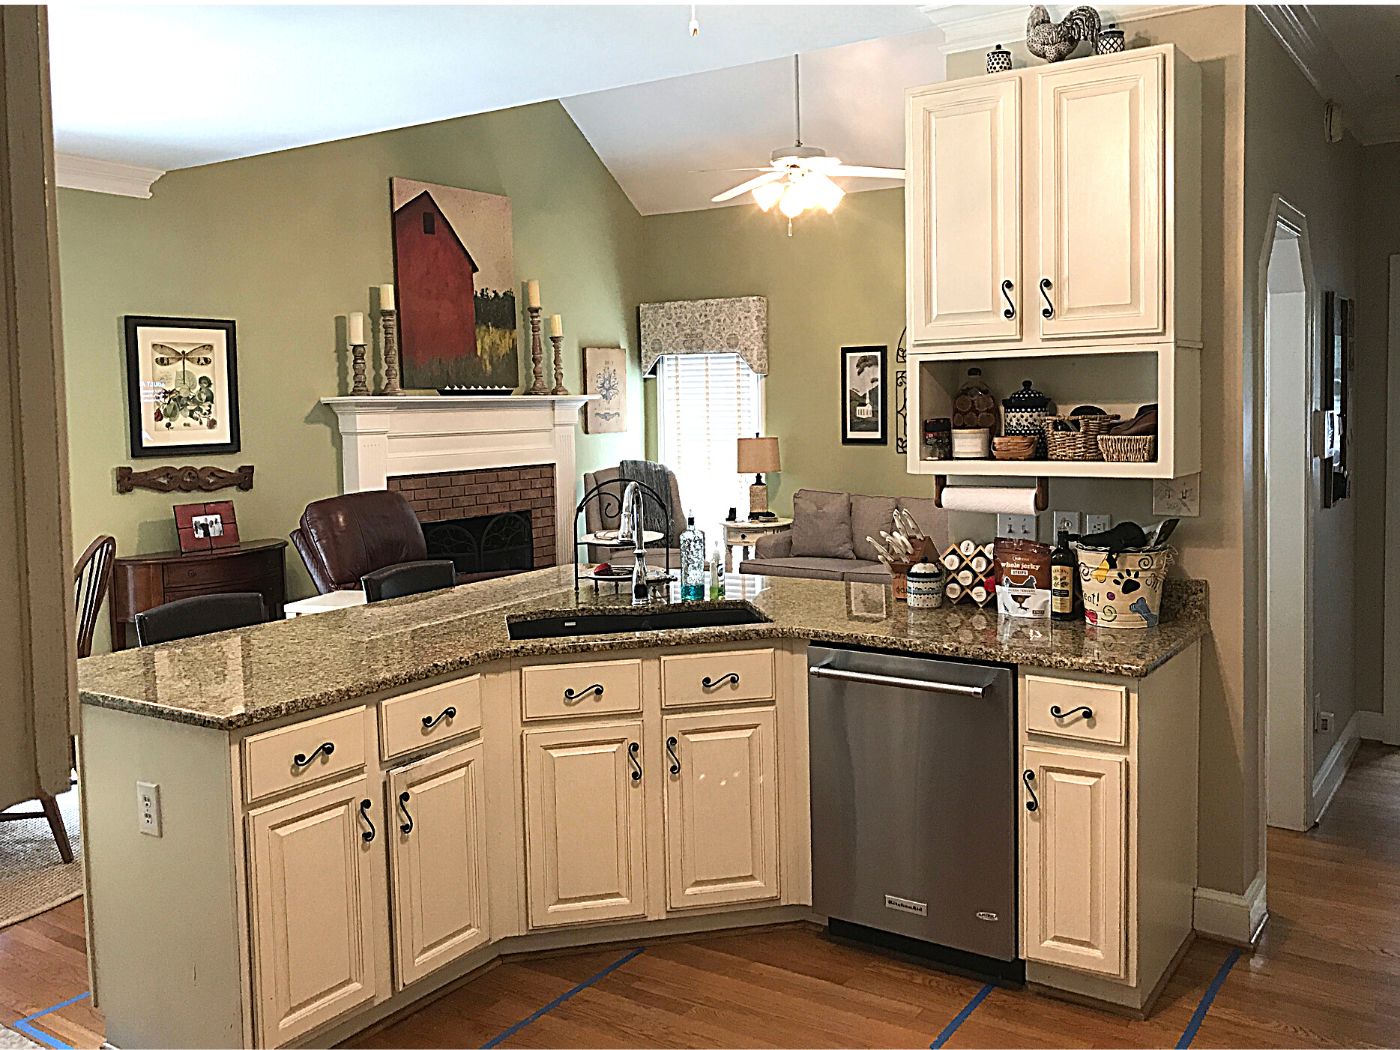
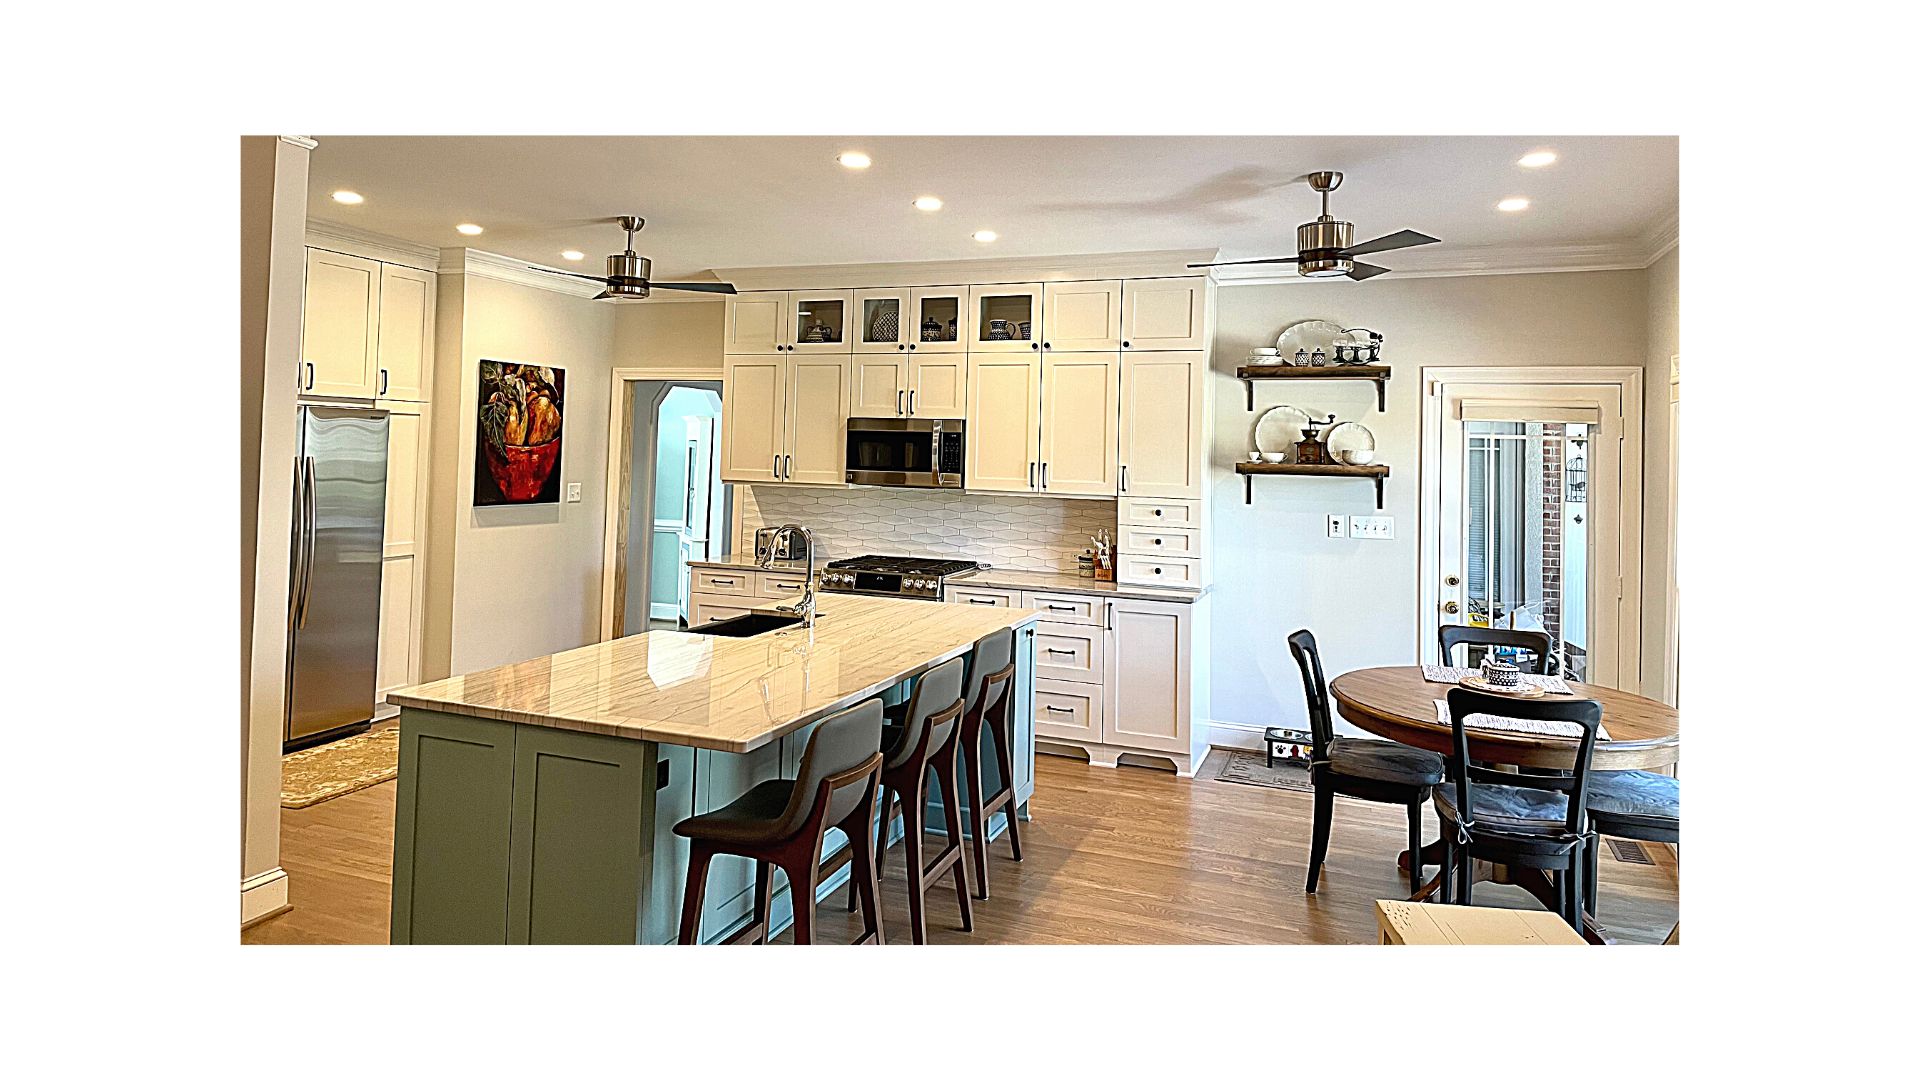
While I think I have a knack for interior decorating, I knew the scope of this project required a design professional. We met and discussed how I wanted the kitchen to function. Most important for me was to replace the peninsula with an island that will improve flow and increase openness. This means structural changes – plumbing needs to be relocated, part of a wall will be removed and parts of the hardwood floors will require repair. The blue painters’ tape on the floor shows the new footprint of the island and reduced wall. The cabinets above the peninsula are going away when that wall is scaled back by 20 inches. I would have liked to lose the wall completely, but it is load-bearing and would leave a weird exit from the family room to the adjacent laundry and garage hallway.
Before Remodel, 3 Doors on One Wall

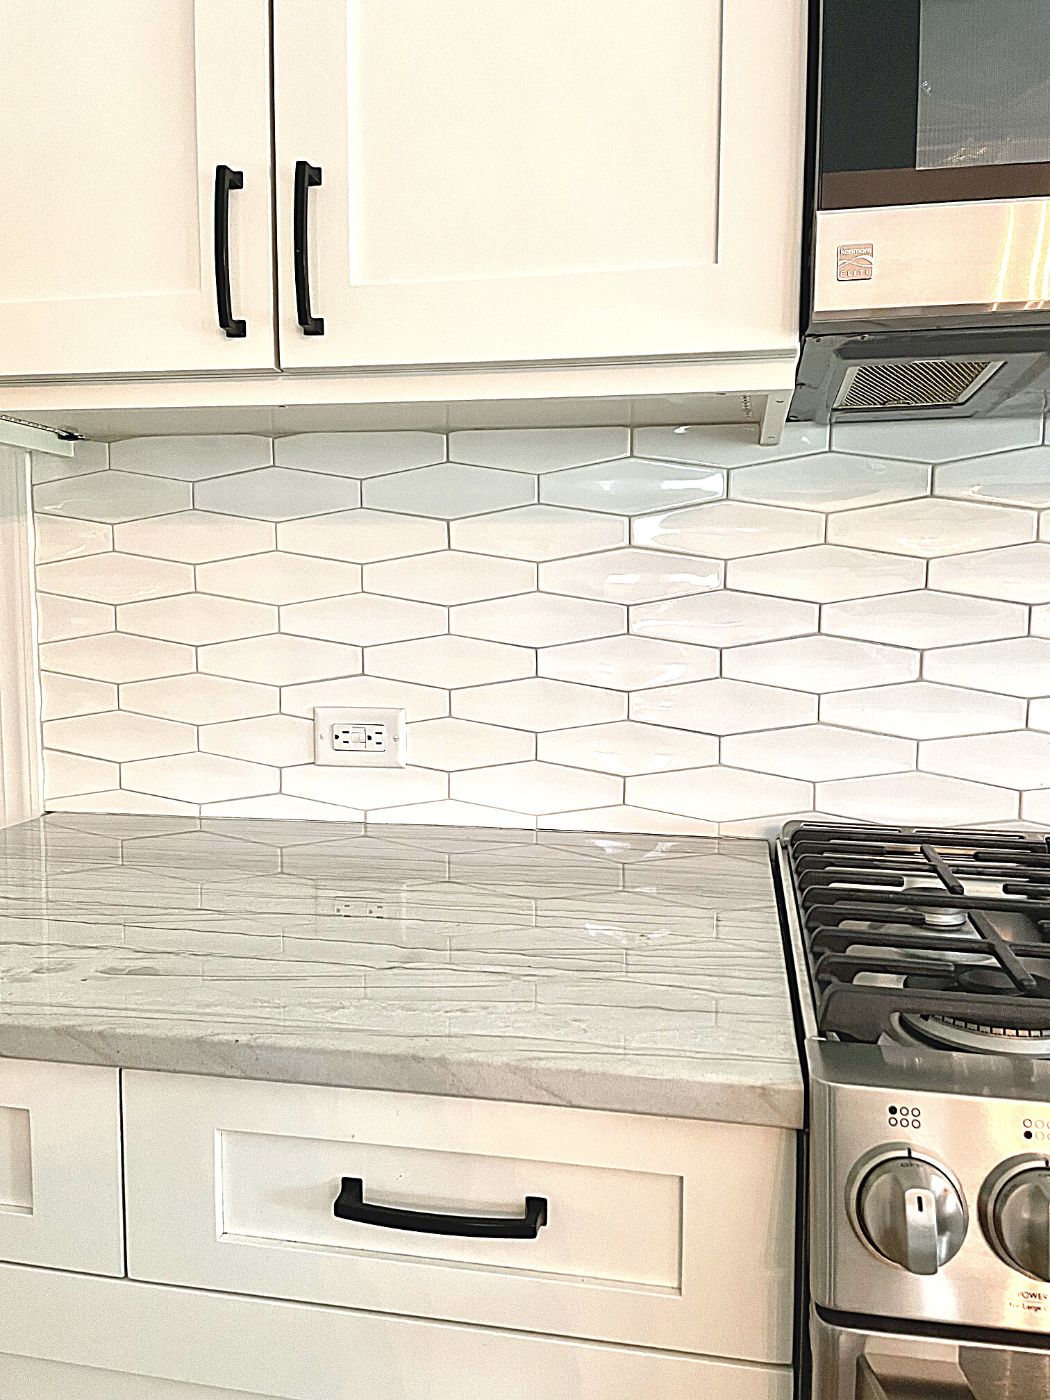
There are two open doorways that lead to the formal dining room. We don’t need both. The second open doorway will be walled over for additional cabinets increasing storage. The third door opens to a screened in porch. The new cabinets will go up to the 9′ ceiling getting rid of the dust-collecting soffit. Lighting will be improved with more recessed cans and two identical modern ceiling fans. I’ve always disliked the mismatched light fixtures. I need the fans because the microwave over the oven is staying. I don’t have the space for a hood and need a way to circulate air when cooking. The backsplash I had installed a number of years earlier, 3 x 9 tan glass subway tiles the matched the wall color, will be replaced.
Before Remodel, Dual Color Corner
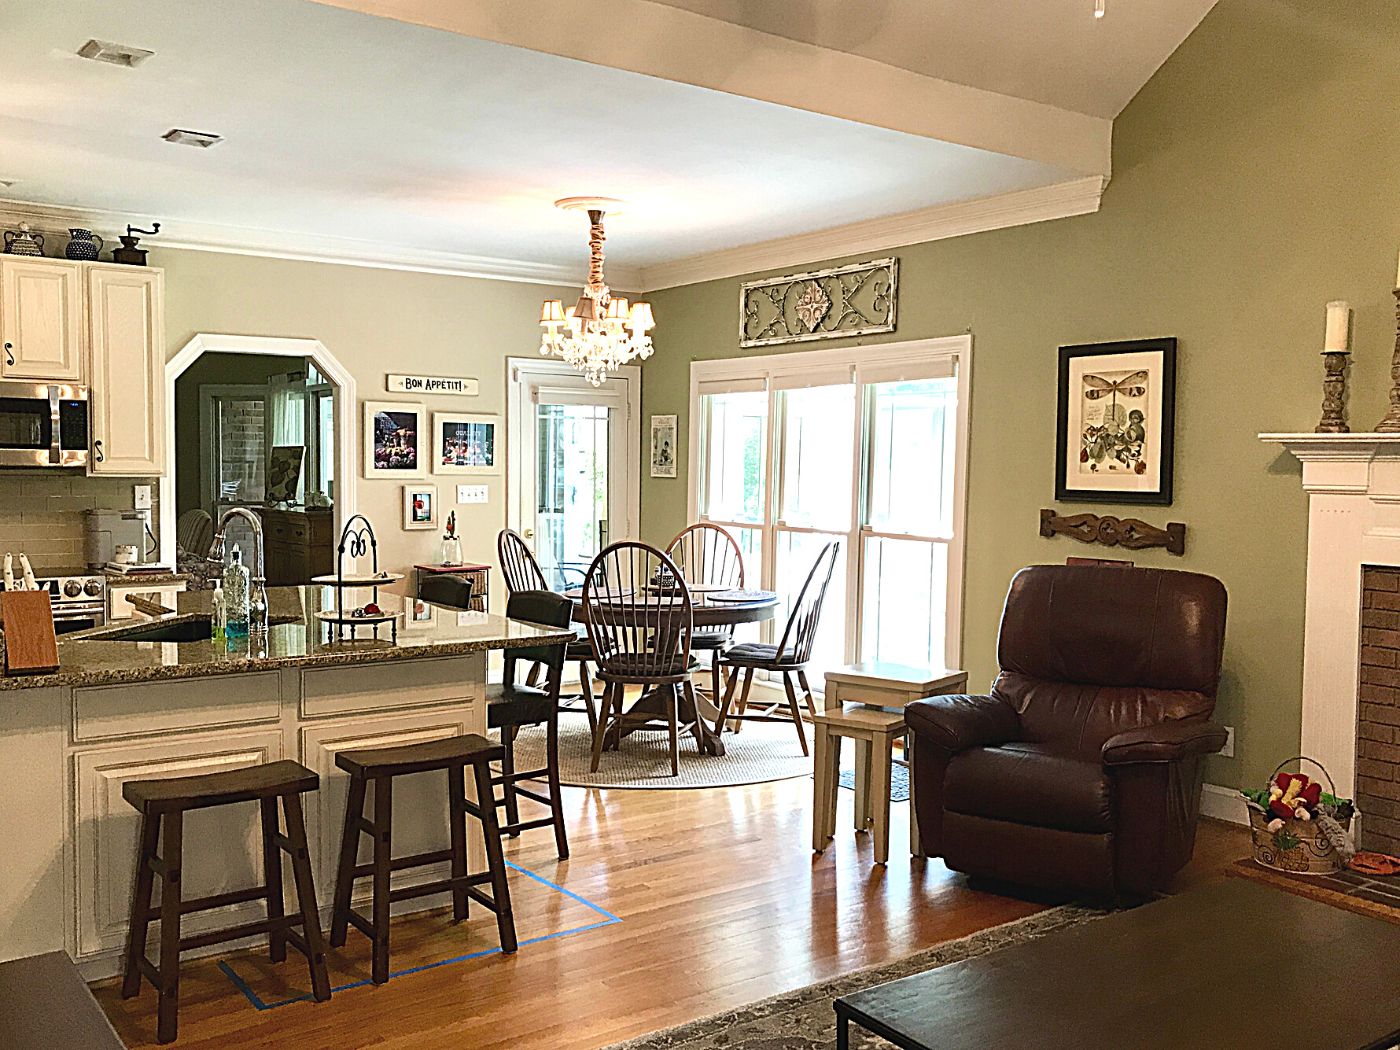
Our home had a partially open floor plan before it was in style. It is part of what sold me on the house! The family room has a vaulted ceiling and joins the breakfast area and kitchen. Years ago I thought it would be a good idea to delineate the rooms with two different paint colors. I now find the two different colors awkward in the joining corner. Part of the remodel will be a color change and the use of one color for the entire area. I ordered several samplize peel and stick samples in lighter warm gray paint shades. This is a great tool that helps when deciding on a new wall color.
Before Remodel, Wasted Space in Refrigerator Alcove
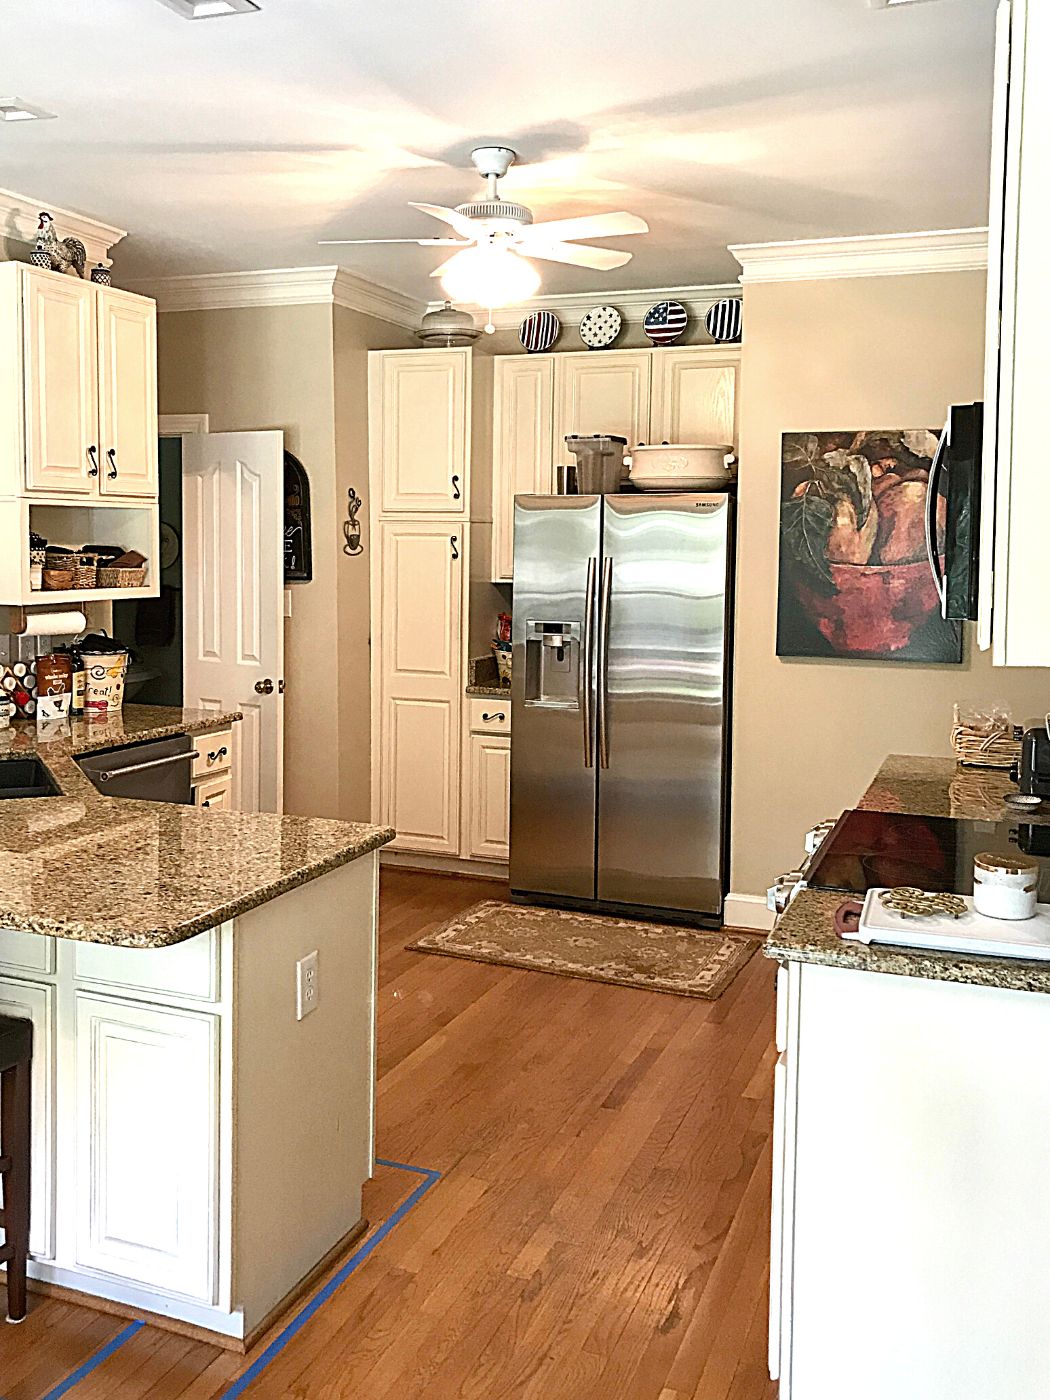
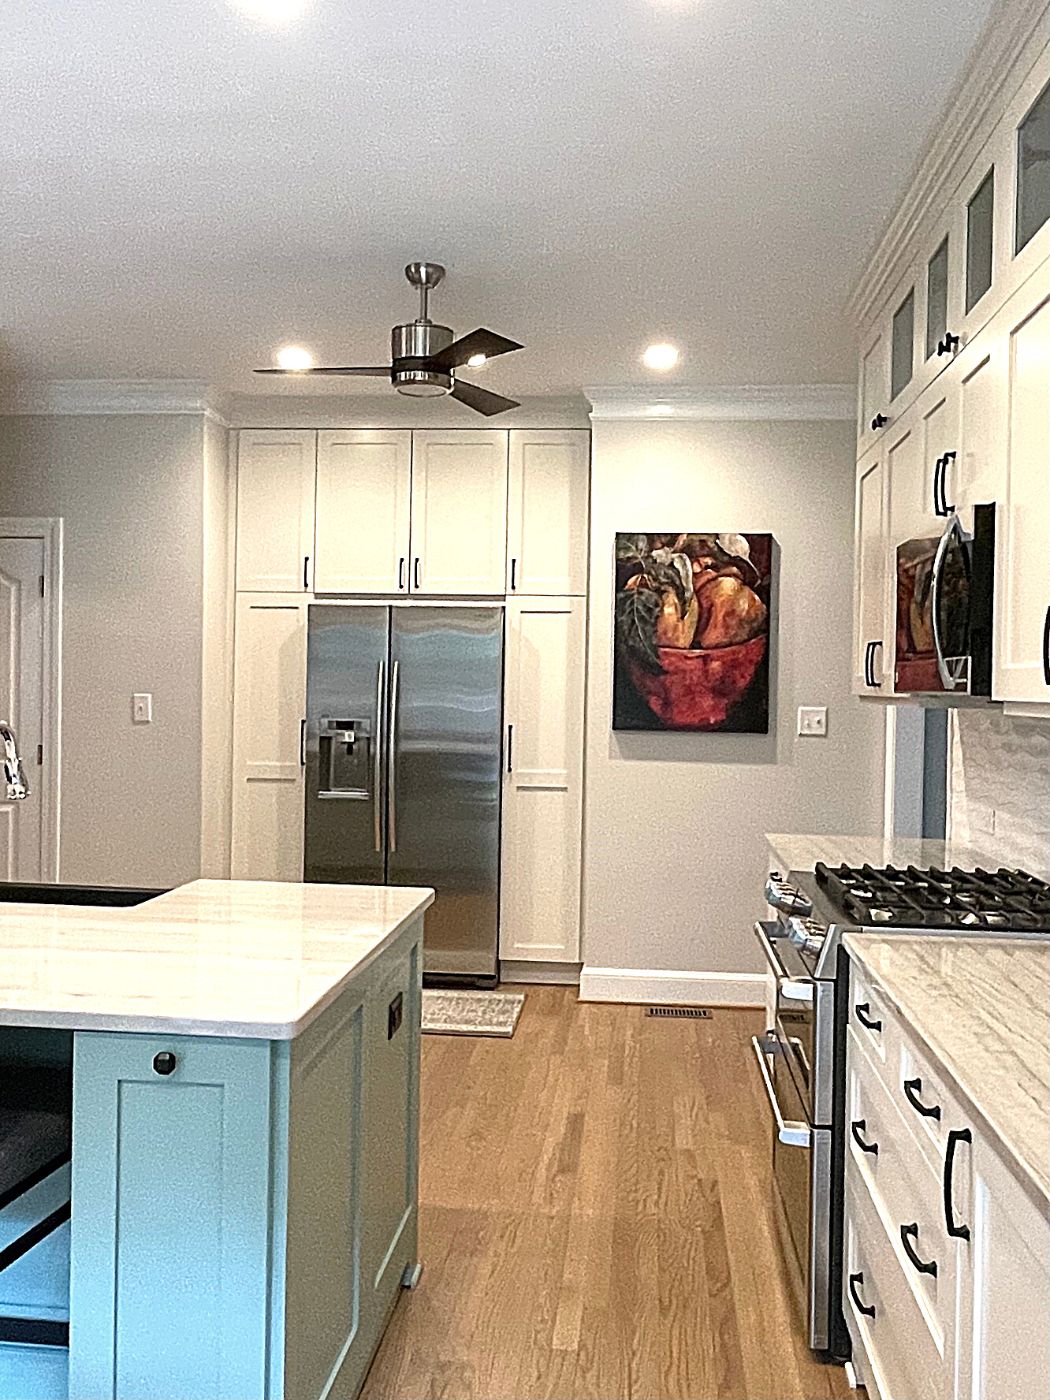
I like that the refrigerator area is recessed into the wall, but there is untapped space potential. The refrigerator sets out 8 inches from the back wall because the door wont fully open unless it is past the adjoining wall.
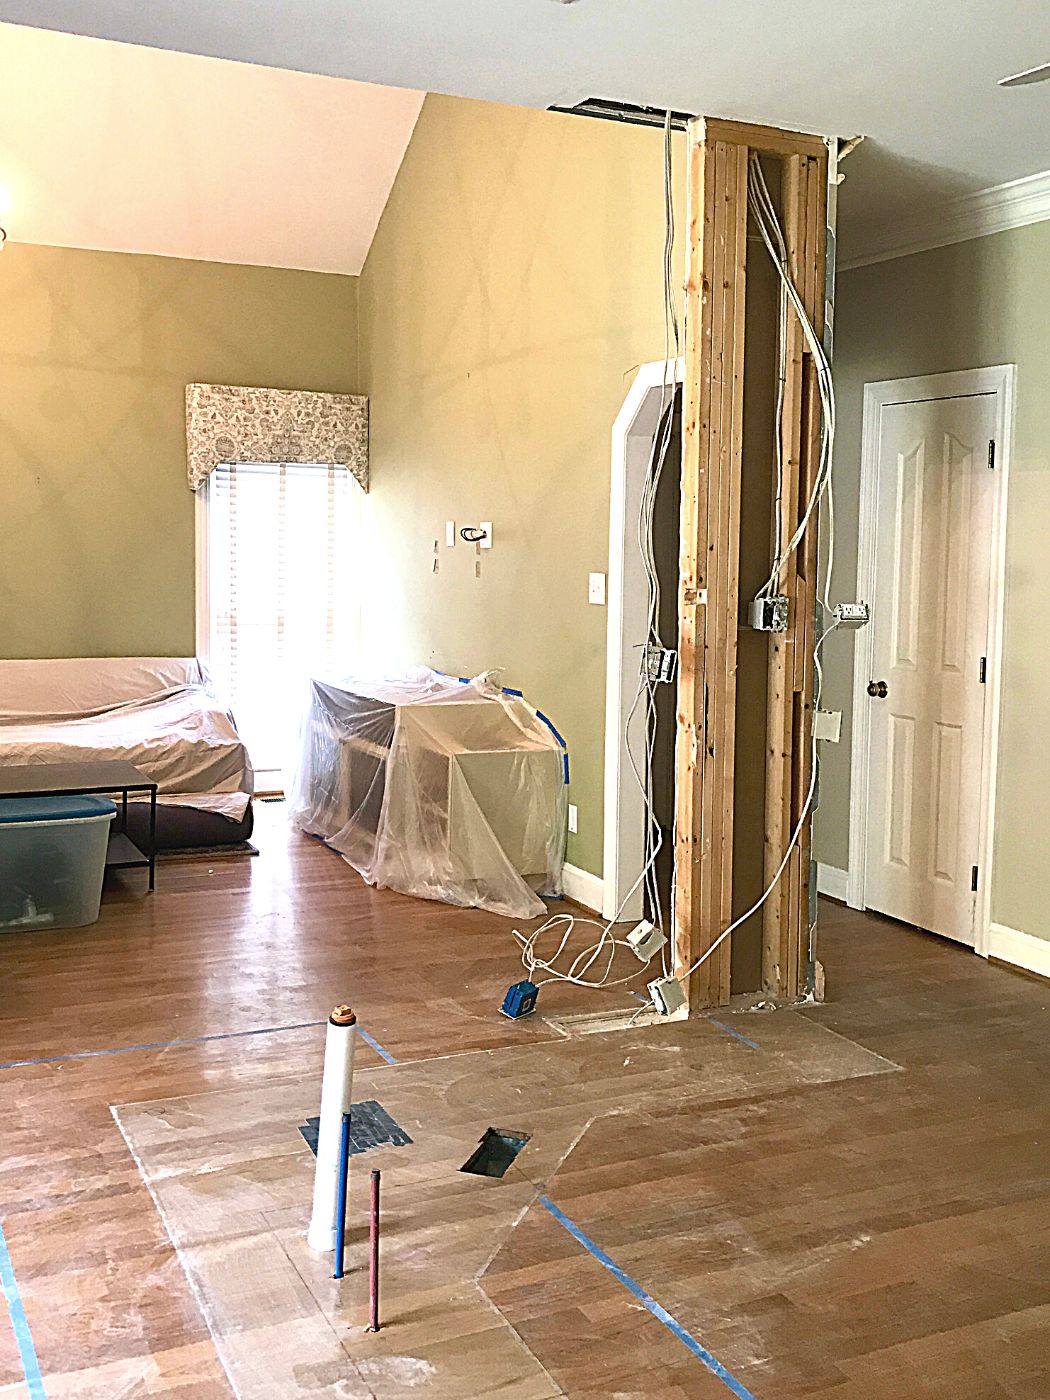
Remodel Demolition
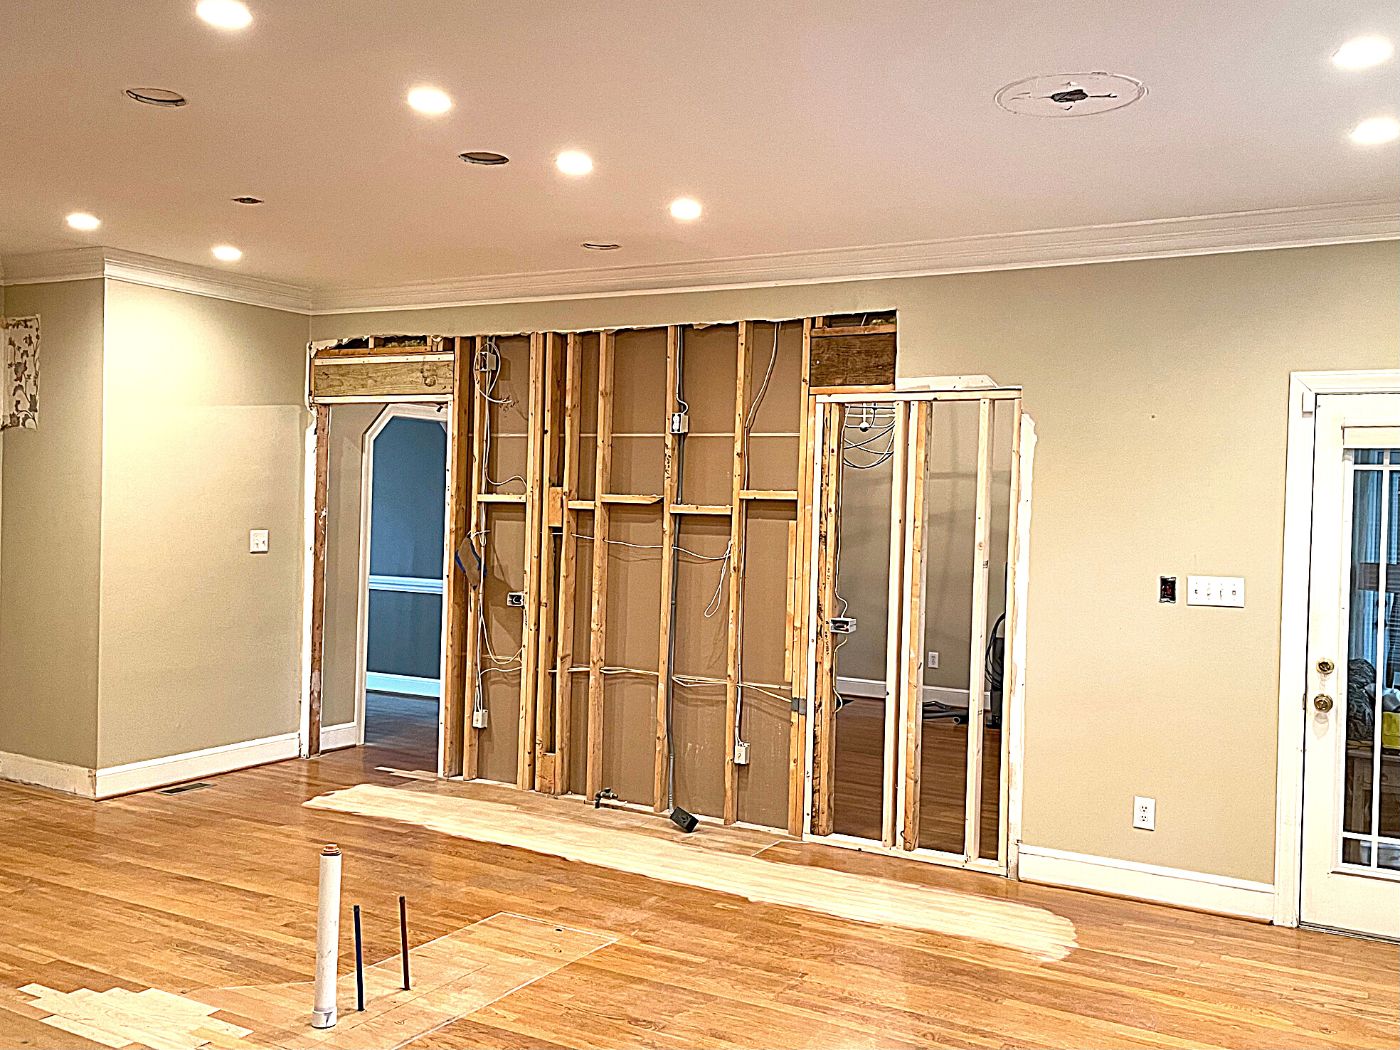
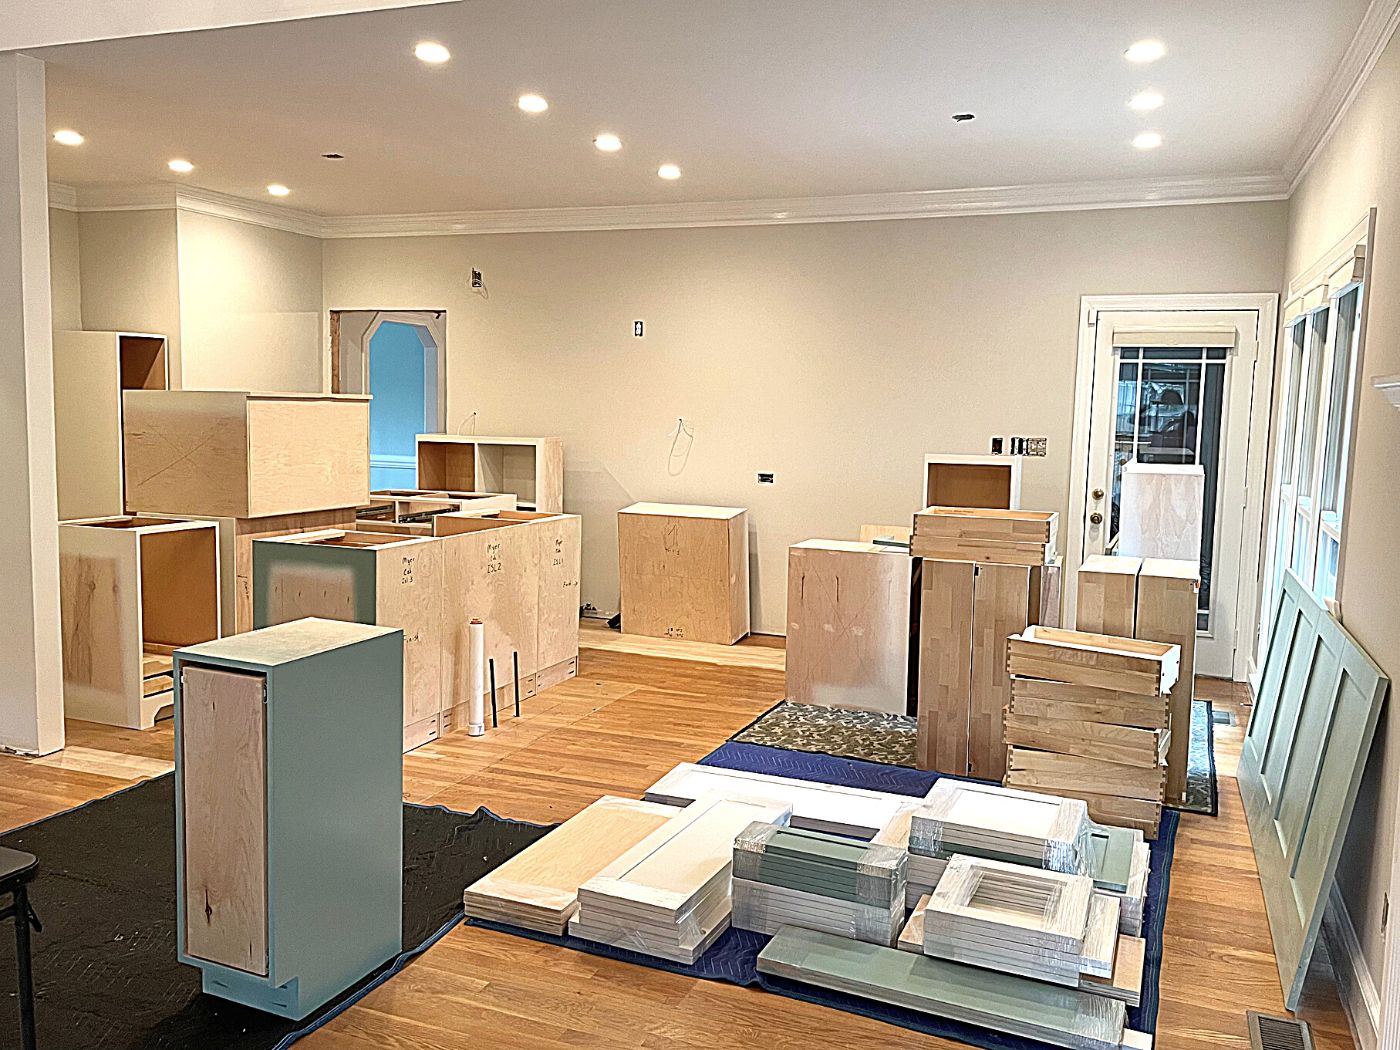
The kitchen transformation took 3 months. We stayed here for most of the process except when the hardwood floors were refinished. We put the furniture from those rooms into temporary storage. Month one included demolition, wiring changes, plumbing relocation, hardwood floor feathered in newly exposed areas, and framing the middle doorway and reduced wall. Month two saw sheet rock added, mudded and sanded (lots of dust), painting (more sanding and dust), cabinets installed, countertops, tile backsplash, faucet and garbage disposal, 10 recessed cans added. Month 3 the floors were sanded, stained, coated with three layers of Bona High Traffic satin water-based sealer. My previous floors had an oil-based polyurethane coat. They had yellowed over the years. I chose a blended stain of 3 parts weathered oak to 1 part classic gray. The water-based top coat will not yellow with age and dried quicker with much less odor.
The finishing touches were new kitchen ceiling fans, replacement of the ugly family room ceiling fan with a statement iron and glass chandelier, a new gas oven, a few new pieces of furniture and a small fireplace mantle makeover. I added a large piece of reclaimed wood stained similar to the floors. Open shelves were installed over the dog feeding station.
The Remodel Reveal – After Photos (We Survived!)
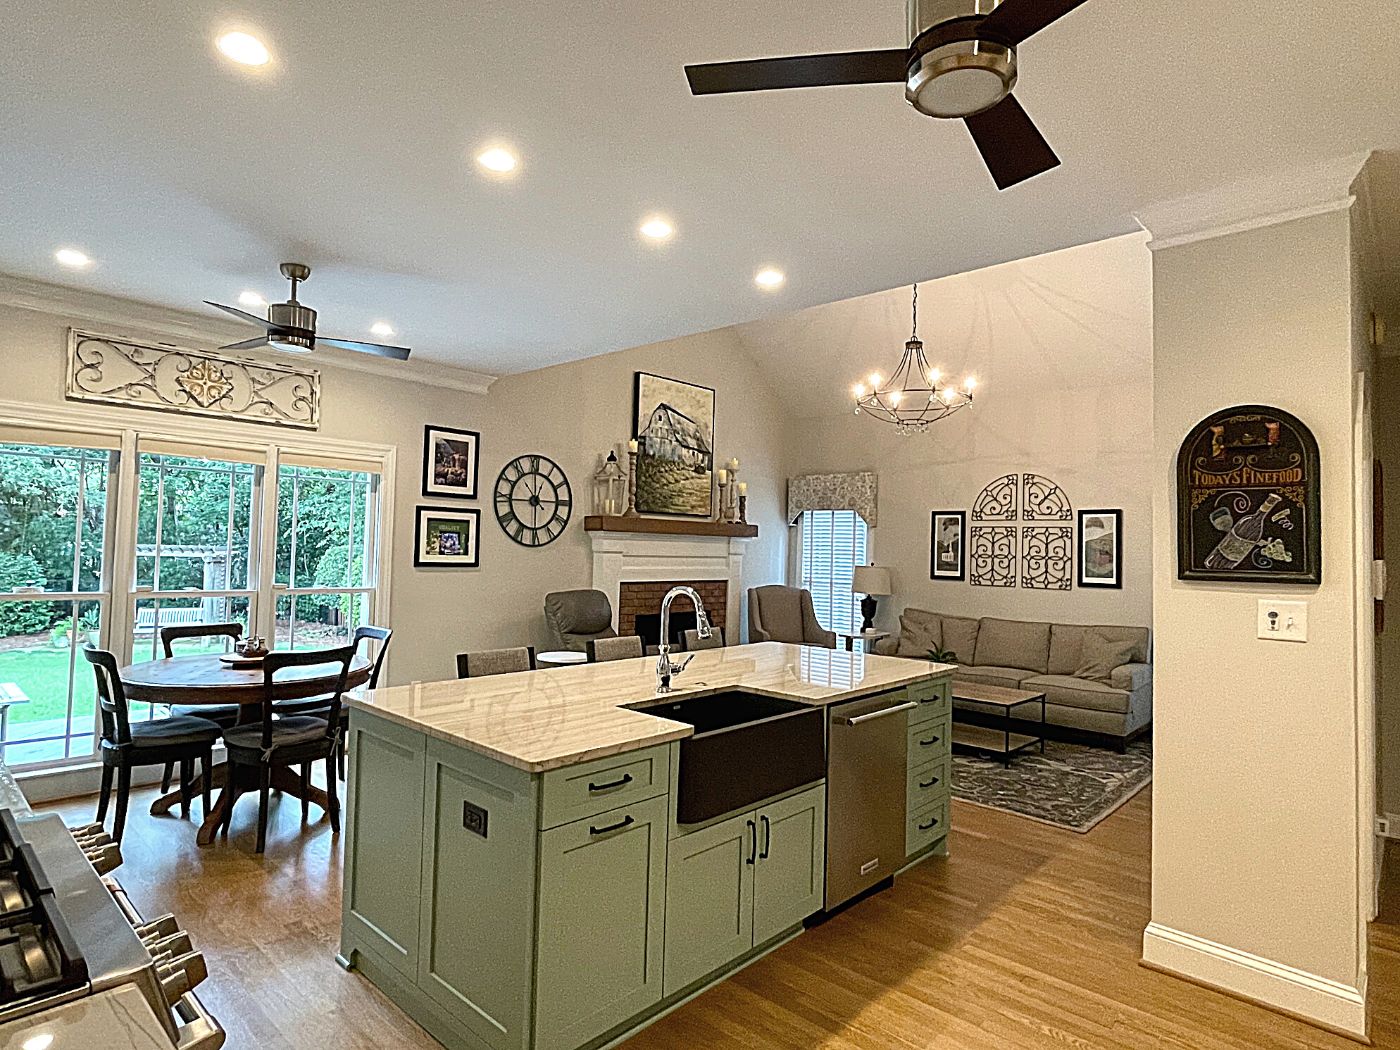
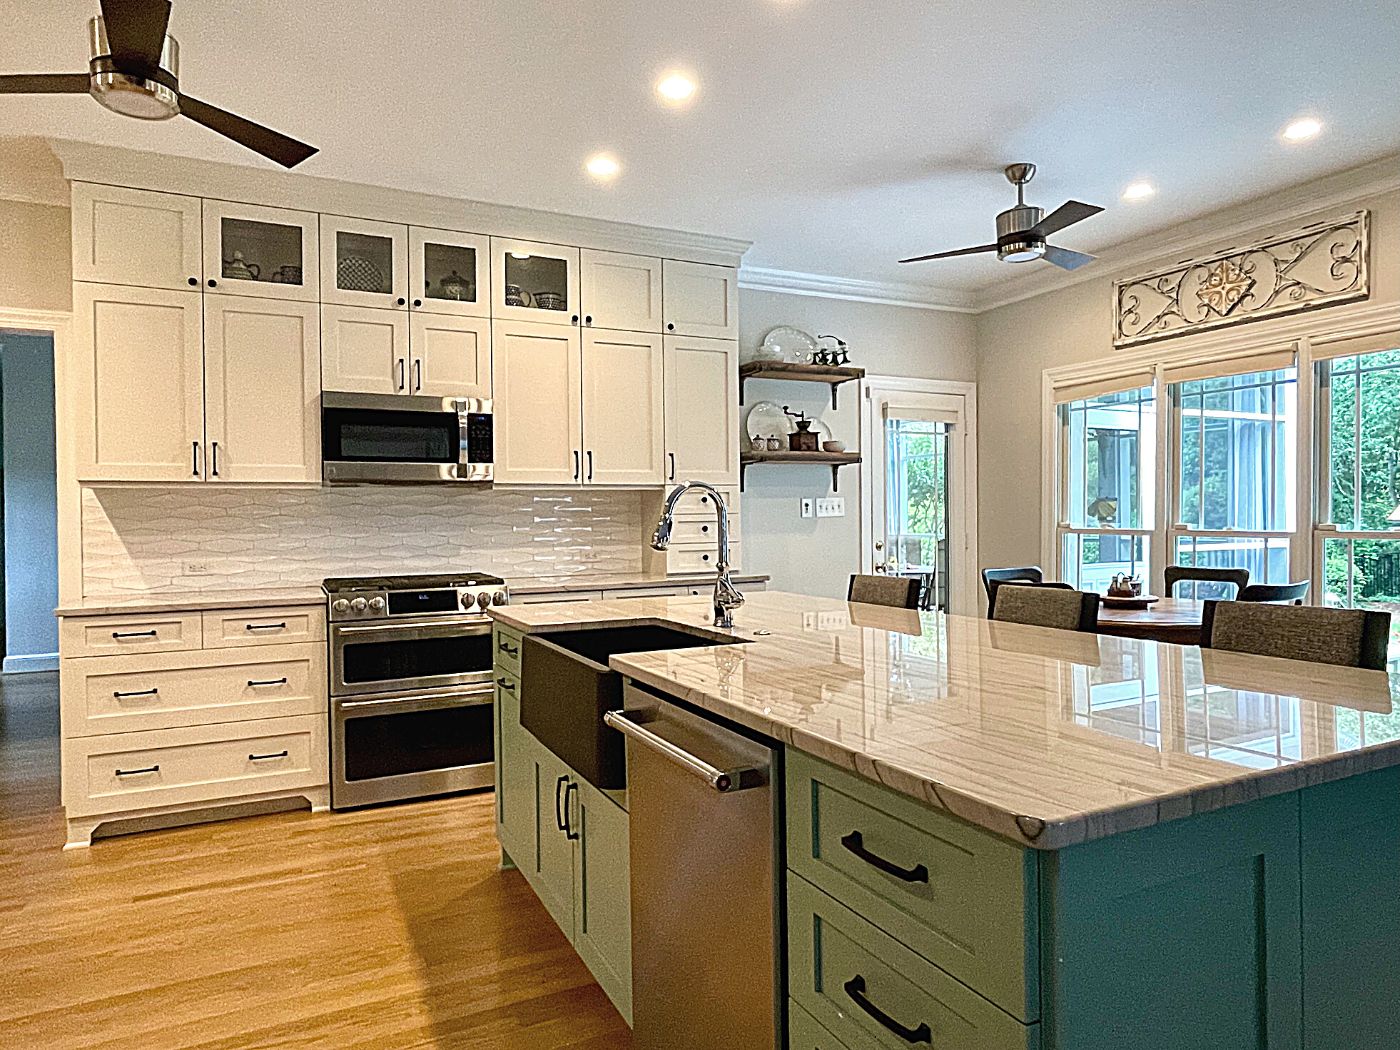
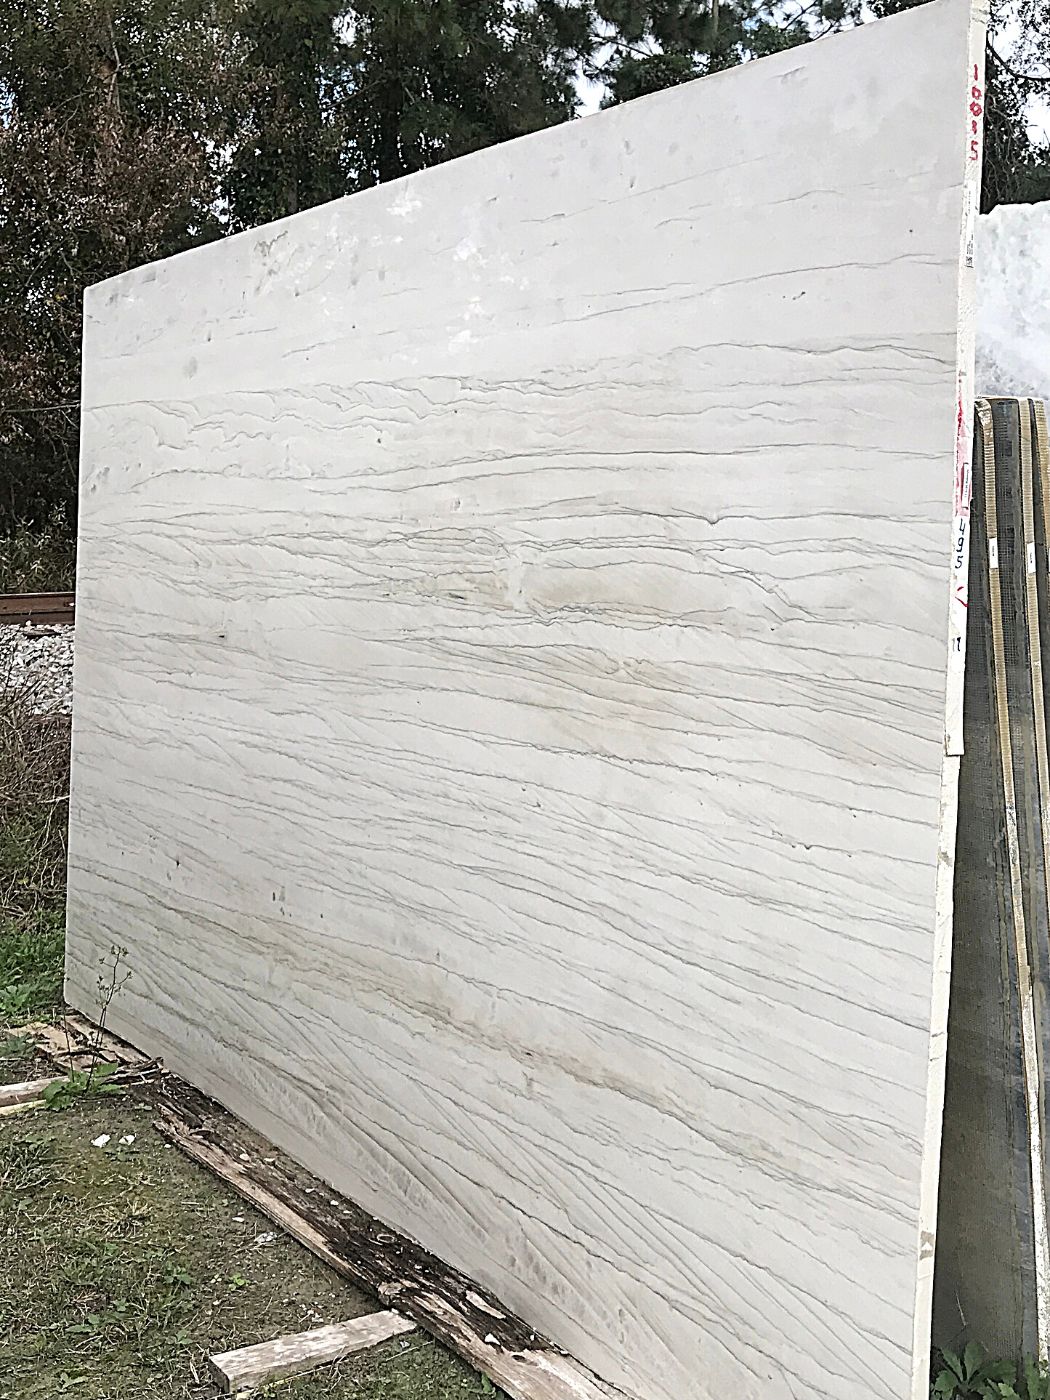
Since I lightened the wall color and went light on the perimeter cabinets and backsplash, I wanted a pop of color for the island. I choose Sherwin Williams Halcyon green. It’s a beautiful neutral sage green and ties together my furniture, accessories and art. For the countertop I choose a natural stone, quartzite. Don’t confuse quartzite with quartz. Quartz are man-made counters that contain ground quartz and plastic resin. Mustang quartzite is mined in Brazil and has an expanse of light gray with more dark veins spaced through it. Reminiscent of marble, it is a much more durable choice. I like its polished gleam. Again, I went a touch darker on the countertops since my other choices were a light, neutral palette. I believe the touch of gray coordinates nicely with the stainless steel appliances.
Although the actual remodel took three months, I carefully planned during the nine months prior. I amassed a huge Pinterest inspiration board, selected contractors, furnishings and all the remodel necessities. We sacrificed a car space and moved our refrigerator to the garage. The FROG (room over the garage) became our family room/kitchenette. We used one of our carpeted guest bedrooms, since our master has hardwood floors. The floors were refinished over Christmas, so for the first time ever we took a vacation over the holidays. Our son, daughter and son-in-law joined us. Being super prepared gave us super results! The rooms are now cohesive, up to date and feel much larger.
According to neighbor.com 70% of empty-nesters do some home renovation after the children move out. A report from Houzz.com sites that 60% of baby boomers age 55 – 74 plan to stay in their homes for the next decade or more. It makes sense! The cost of raising children has declined and there are still earning years ahead. If this applies to you go for it! Thanks for visiting; feel free to ask questions in the comments section.
Did you redo the floors?
Yes, good eye! The floor refinishing was a huge improvement in making our kitchen and family room feel refreshed and updated. Previously, an oil-based clearcoat had yellowed over time to an unattractive color. I had the floors sanded down to the bare oak. A stain was then applied ( I used a mix of Minwax – 3/4 weathered oak and 1/4 classic gray). Three topcoats of Bona high traffic, water-based topcoat in a satin sheen sealed the redo. I highly recommend the Bona water-based topcoat. It cures/dries more quickly than oil and shouldn’t yellow with time the way an oil-based sealer does.
How did you feel about the sink in the island?
I love it! The previous position was good before (in sight of the TV). Now I look out the kitchen windows while at the sink – also a nice view!
Great renovation! How fun to update and give what was old a brand new fresh life!
Thanks Julie! I did have fun during the process 🙂
It’s gorgeous! You have such a good eye for color!
Thank you so much Pam!
Great article, Jody! Beautiful finished product! See you in C’ville!
Thank you kindly Patty! Looking forward to the Game Weekend 🙂